


You are looking at the documentation of a prior release. To read the documentation of the latest release, please
visit here.
New to KubeVault? Please start here.
In this tutorial, we’ll see how we can enable, configure JWT/OIDC auth method & use it to authenticate to VaultServer using KubeVault.
Before jumping in, an
OIDC Providermust be configured. AnAuth0application has already been configured for this tutorial purpose. ApplicationDomain,Client ID,Client Secret,Allowed Callback URLs, etc. must be properly set from the provider side.
Deploy VaultServer, Enable & Configure Auth Methods
Let’s start by deploying the VaultServer. We’re going to enable & configure JWT auth method in this tutorial.
Here’s the complete VaultServer yaml:
apiVersion: kubevault.com/v1alpha2
kind: VaultServer
metadata:
  name: vault
  namespace: demo
spec:
  version: 1.10.3
  replicas: 2
  allowedSecretEngines:
    namespaces:
      from: All
    secretEngines:
    - gcp
  authMethods:
  - type: jwt
    path: jwt
    jwtConfig:
      defaultLeaseTTL: 1h
      defaultRole: k8s.kubevault.com.demo.reader-writer-role
      oidcClientID: aFSrk3w06WsQqyjA30HvhbbJIR1VBidU
      oidcDiscoveryURL: https://dev-tob49v6v.us.auth0.com/
      credentialSecretRef:
        name: jwt-cred
  backend:
    raft:
      storage:
        storageClassName: "standard"
        resources:
          requests:
            storage: 1Gi
  unsealer:
    secretShares: 3
    secretThreshold: 2
    mode:
      kubernetesSecret:
        secretName: vault-keys
  monitor:
    agent: prometheus.io
    prometheus:
      exporter:
        resources: {}
  terminationPolicy: WipeOut
Let’s focus on the .spec.authMethods section here:
authMethods:
  - type: jwt
    path: jwt
    jwtConfig:
      defaultLeaseTTL: 1h
      defaultRole: k8s.kubevault.com.demo.reader-writer-role
      oidcClientID: aFSrk3w06WsQqyjA30HvhbbJIR1VBidU
      oidcDiscoveryURL: https://dev-tob49v6v.us.auth0.com/
      credentialSecretRef:
        name: jwt-cred
.spec.authMethods.typeis a required field, the type of authentication method we want to enable..spec.authMethods.pathis a required field, the path where we want to enable this authentication method..spec.authMethods.jwtConfigcontains various configuration for this authentication method. Details about configurationparameterscan be found here: JWT/OIDC Configuration.
In the .spec.authMethods.jwtConfig section, we’ve provided the necessary configuration details. A K8s Secret jwt-cred containing the provider Client Secret needs to be created before deploying the VaultServer, which is referred in the .credentialSecretRef section.
Here’s the Secret yaml:
apiVersion: v1
kind: Secret
metadata:
  name: jwt-cred
  namespace: demo
stringData:
  oidc_client_secret: <oidc-client-secret-id>
Deploy the VaultServer
Let’s create the Secret first:
$ kubectl apply -f jwt-cred.yaml
secret/jwt-cred created
Let’s deploy the VaultServer now:
$ kubectl apply -f vaultserver.yaml
vaultserver.kubevault.com/vault created
Upon successful deployment of VaultServer, the defined authMethods will be enabled & configured by the provider configuration. KubeVault operator will also create the necessary policies required for the auth methods.
We can verify it using the Vault CLI:
$ vault auth list

Path           Type          Accessor                    Description
----           ----          --------                    -----------
jwt/           jwt           auth_jwt_ba23cc30           n/a
kubernetes/    kubernetes    auth_kubernetes_40fd86fd    n/a
token/         token         auth_token_950c8b80         token based credentials
$ vault read auth/jwt/config

Key                       Value
---                       -----
bound_issuer              n/a
default_role              k8s.kubevault.com.demo.reader-writer-role
jwks_ca_pem               n/a
jwks_url                  n/a
jwt_supported_algs        []
jwt_validation_pubkeys    []
namespace_in_state        true
oidc_client_id            aFSrk3w06WsQqyjA30HvhbbJIR1VBidU
oidc_discovery_ca_pem     n/a
oidc_discovery_url        https://dev-tob49v6v.us.auth0.com/
oidc_response_mode        n/a
oidc_response_types       []
provider_config           map[]
Create VaultPolicy & VaultPolicyBinding
So, we’re now ready to create VaultPolicy & VaultPolicyBinding. We’ll create a simple KV policy to enable user with read & list privileges only.
Here’s the VaultPolicy yaml that we’re going to create:
apiVersion: policy.kubevault.com/v1alpha1
kind: VaultPolicy
metadata:
  name: reader-policy
  namespace: demo
spec:
  vaultRef:
    name: vault
  policyDocument: |
    path "/kv/*" {
      capabilities = ["read", "list"]
    }
Let’s create the VaultPolicy:
$ kubectl apply -f policy.yaml
vaultpolicy.policy.kubevault.com/reader-policy created
Here’s the VaultPolicyBinding yaml that we’re going to create. Notice that, in the .spec.subjectRef section we’re using the jwt method which is already enabled.
apiVersion: policy.kubevault.com/v1alpha1
kind: VaultPolicyBinding
metadata:
  name: reader-role
  namespace: demo
spec:
  vaultRef:
    name: vault
  policies:
    - ref: reader-policy
  subjectRef:
    jwt:
      path: jwt
      boundAudiences:
      - "aFSrk3w06WsQqyjA30HvhbbJIR1VBidU"
      allowedRedirectUris:
      - "http://localhost:8200/ui/vault/auth/jwt/oidc/callback"
      - "http://localhost:8250/oidc/callback"
      userClaim: "sub"
Let’s create the VaultPolicyBinding:
$ kubectl apply -f policybinding.yaml
vaultpolicybinding.policy.kubevault.com/reader-role created
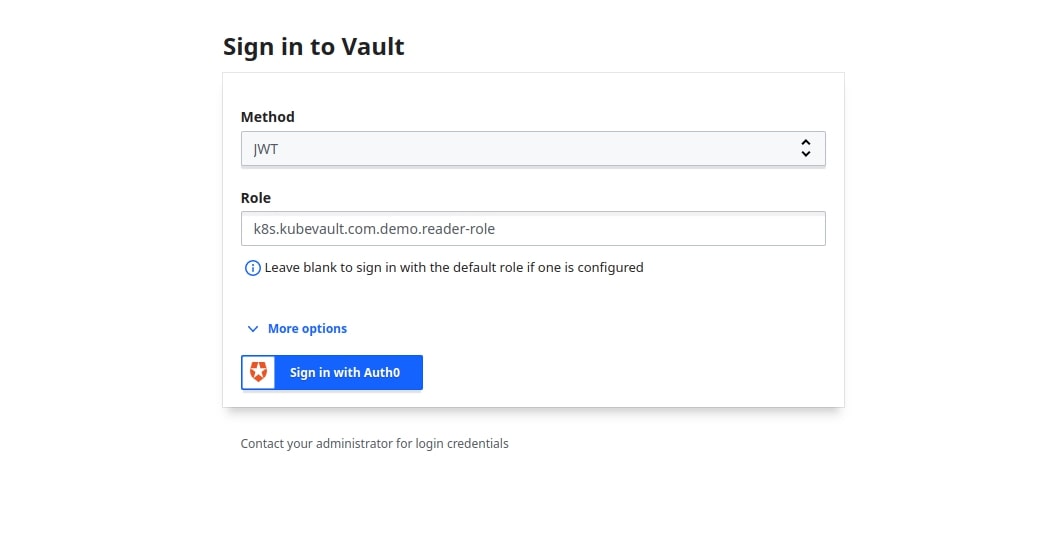
When a VaultPolicyBinding is created, KubeVault will create a role which can be used to Login to the Vault. A Vault role vaultRoleName: k8s.kubevault.com.demo.reader-role will be created in our case.
Now, we can port-forward from Vault & Login using the Vault UI with this role & the authentication method.